Ordinarily the N2, O2, H2O, CO2, CO, NOx… and other gases exit the tailpipe but driver complaints indicated that exhaust smells were entering the interior.
It was somewhat of a mystery because noxious odors would only manifest after the engine had been operating for awhile (warmed-up) and only when the vehicle was stationary (idling at a stop sign). Common deduction was that the emissions were drawn in through the fresh air ventilation system; so possibly emanating from under-hood? DIY Forum searches revealed no symptomatic similarities unfortunately, but it was revealed that not all exhaust is directed to the tailpipe at least not immediately.
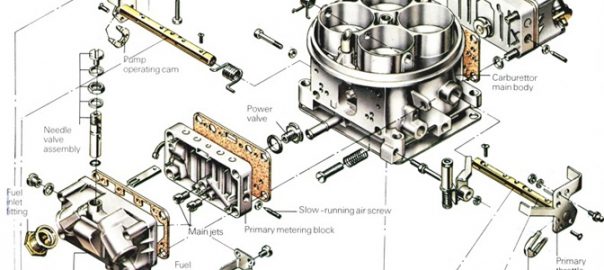
Inner workings to help achieve automobile emissions standards include things like exhaust gas recirculation (EGR) which is exactly as it sounds. A portion of spent gas is returned to the combustion chamber to act as absorbents of combustion heat. Another subsystem is called secondary air injection wherein fresh air is injected into the exhaust stream to allow for a fuller combustion of exhaust gases.
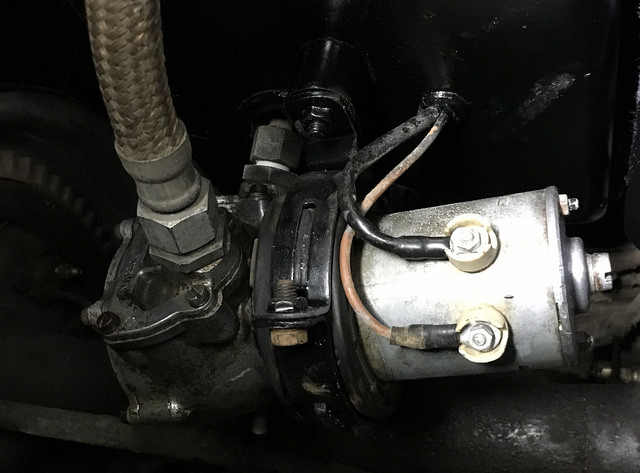
This is a good detective starting place because of their attendant plumbing and routing all of which is located under-hood making them suspect. The aforementioned DIY search revealed the secondary air injection as a typical trouble spot and prone to early fan blade failure so the investigation invited focus.

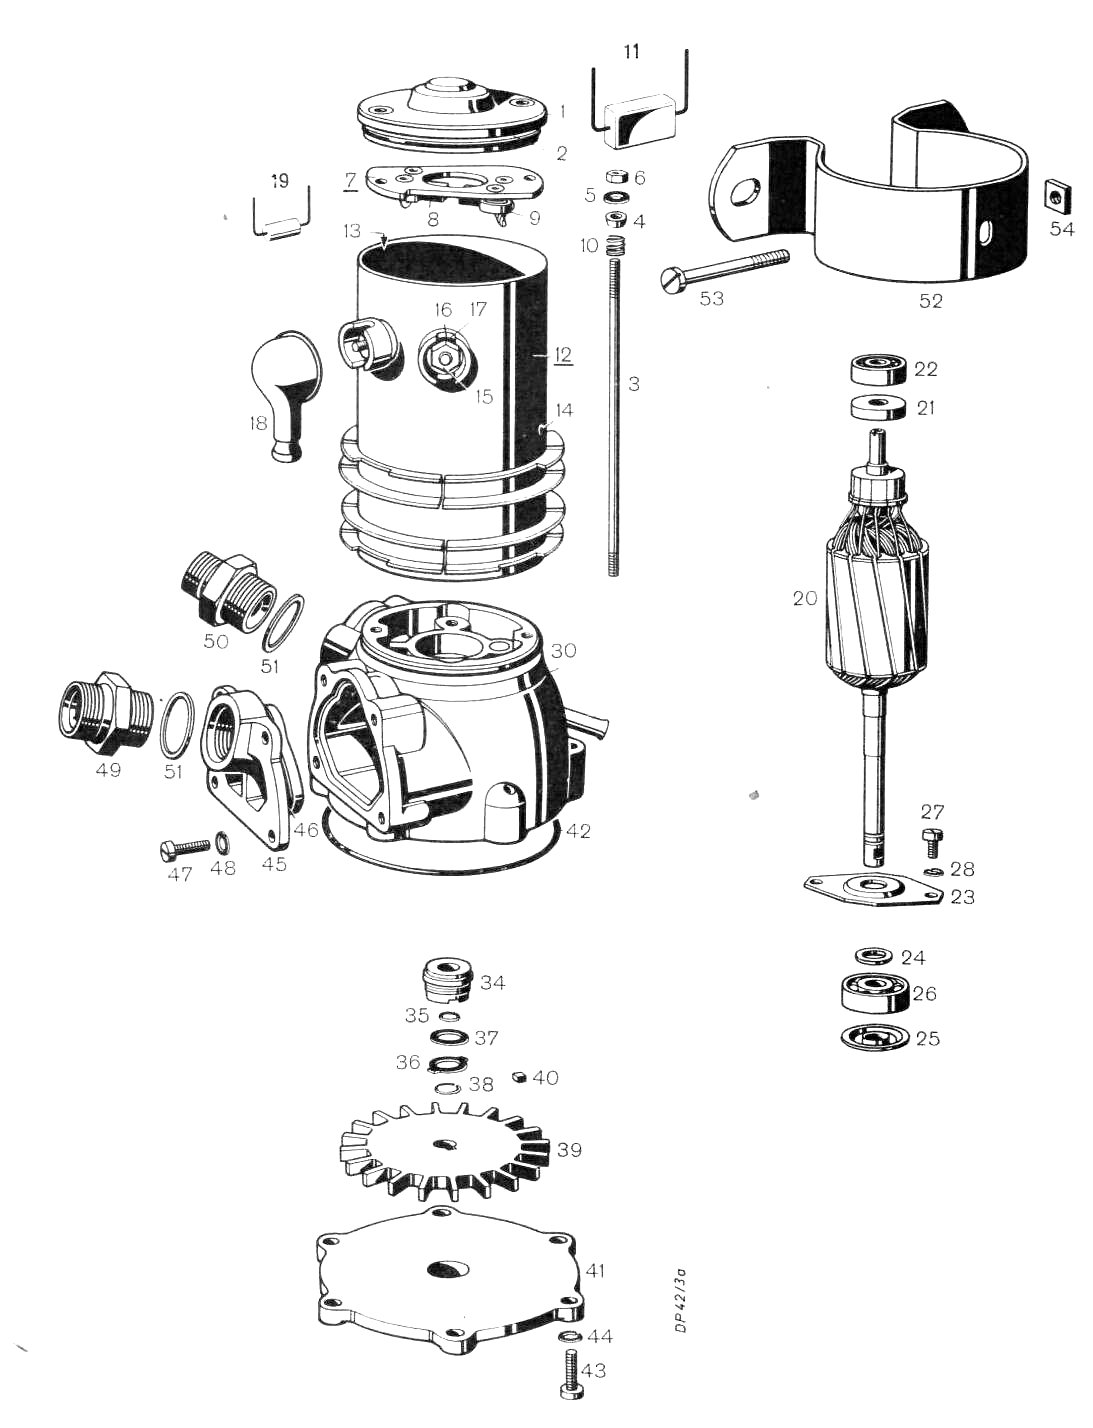
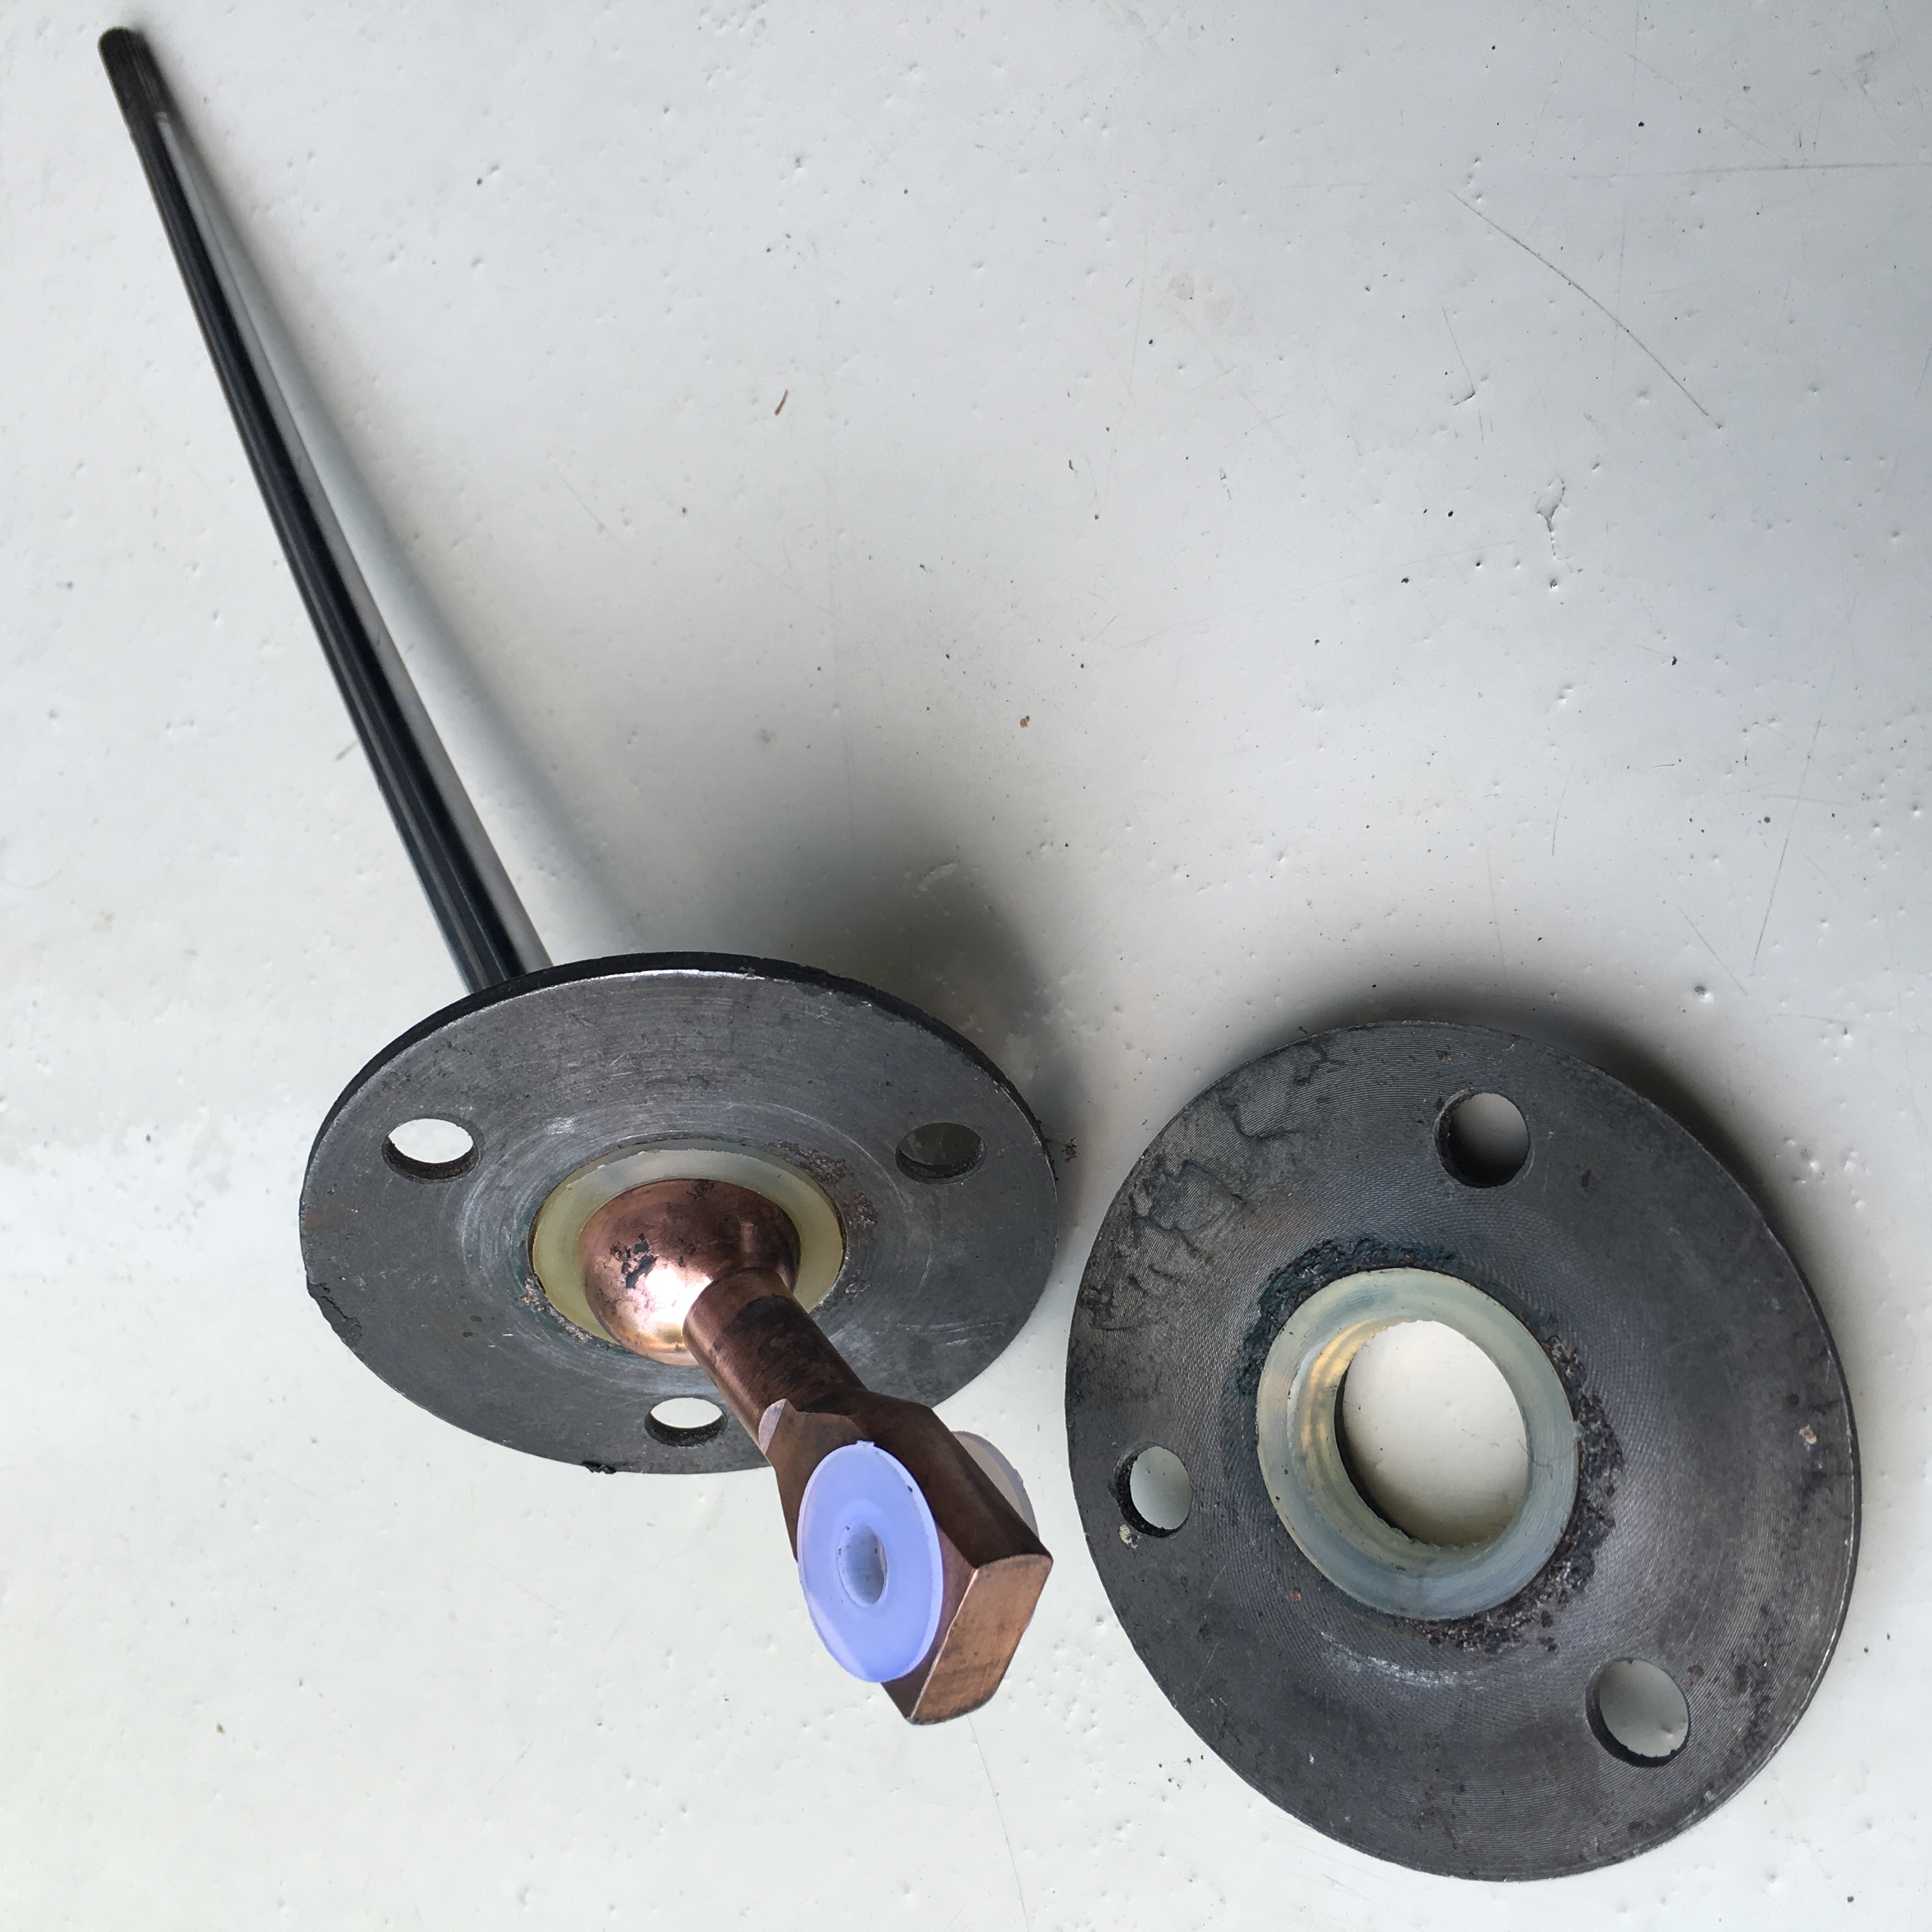
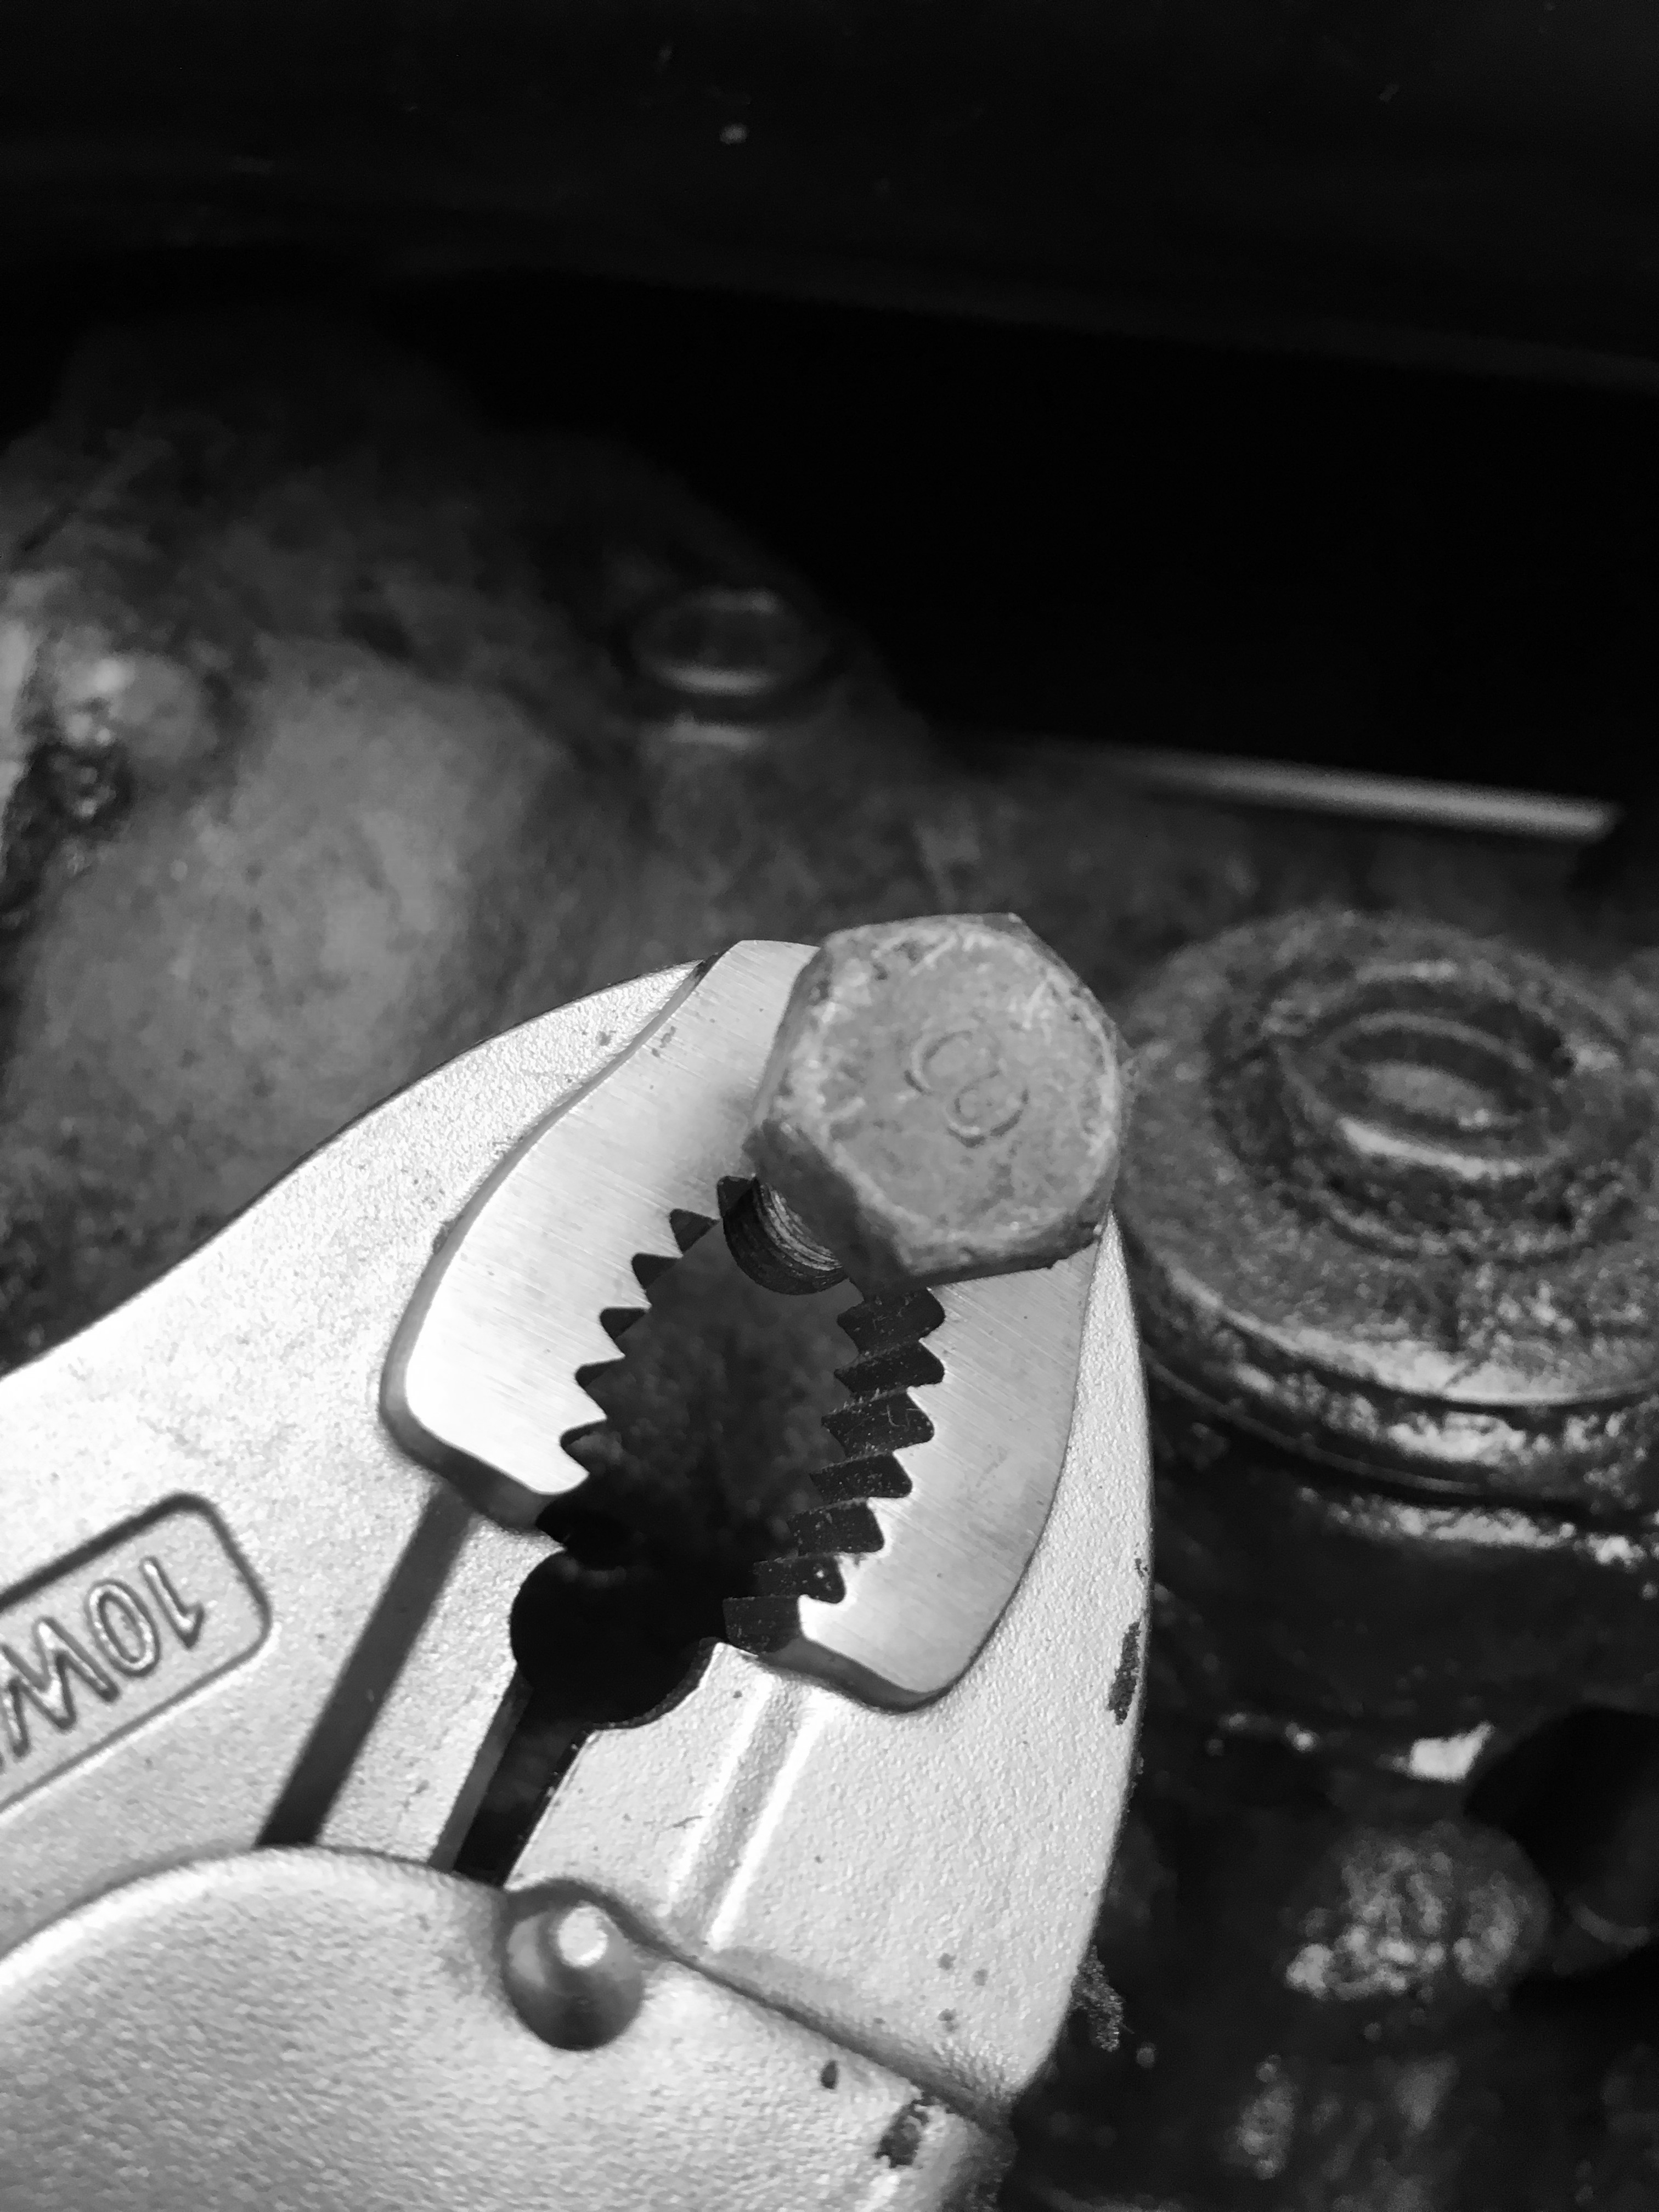
An electric air pump (2) that operates only after an engine cold start and ceases at warm-up (fitting the driver complaint scenario) draws under-hood air from behind its finned cover and pushes it under pressure through rubber hose (8) where it meets one-way valve (10). From there it directly enters an exhaust manifold depicted in the diagram by grey outline silhouette. Bolt (12) attaches the one-way valve to this manifold. The purpose of the valve is dual purpose: to allow air to pass into the exhaust manifold to mix with the exhaust therein but also to prevent the exhaust gas to reverse flow when the air pump is switched off. Hence one-way.
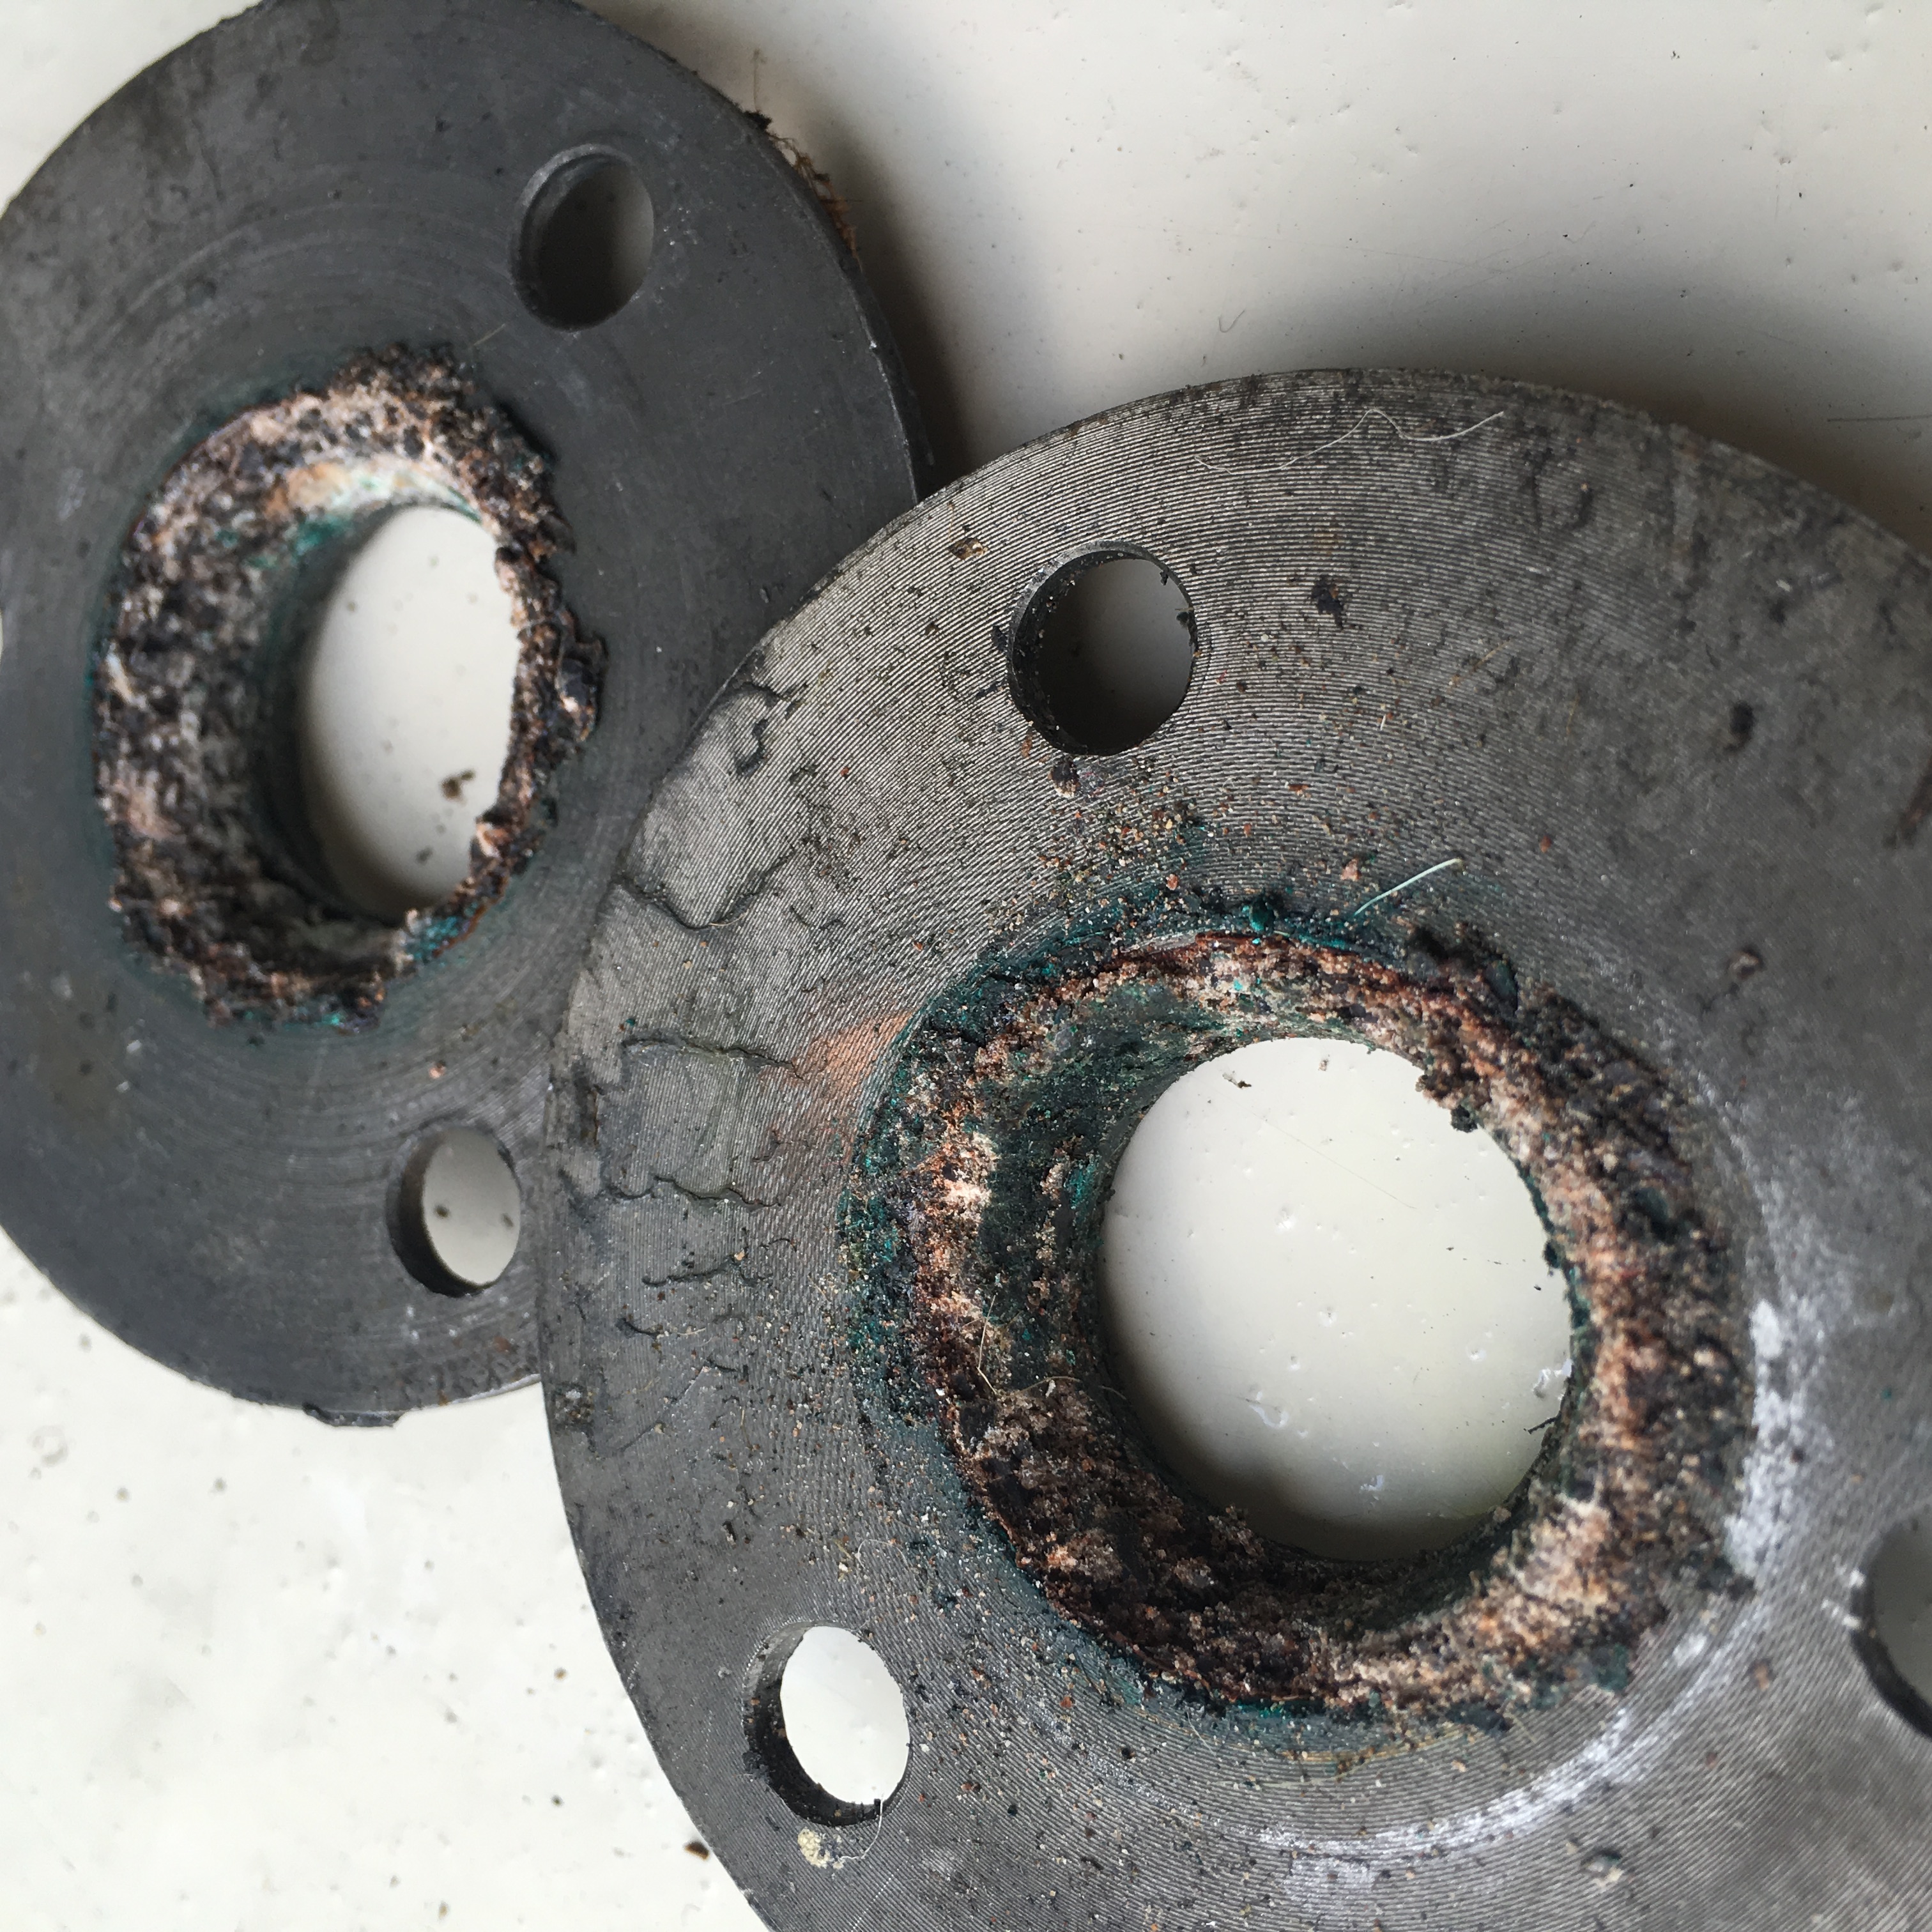
Remove the finned cover revealed a ‘smoking gun’ find. Underside was heavy moisture (a by-product of combustion), black soot, and grime — a dead giveaway. Further inspection with removal of the check valve revealed that it was possible to blow air through the valve in either direction without impediment and was therefore faulty.

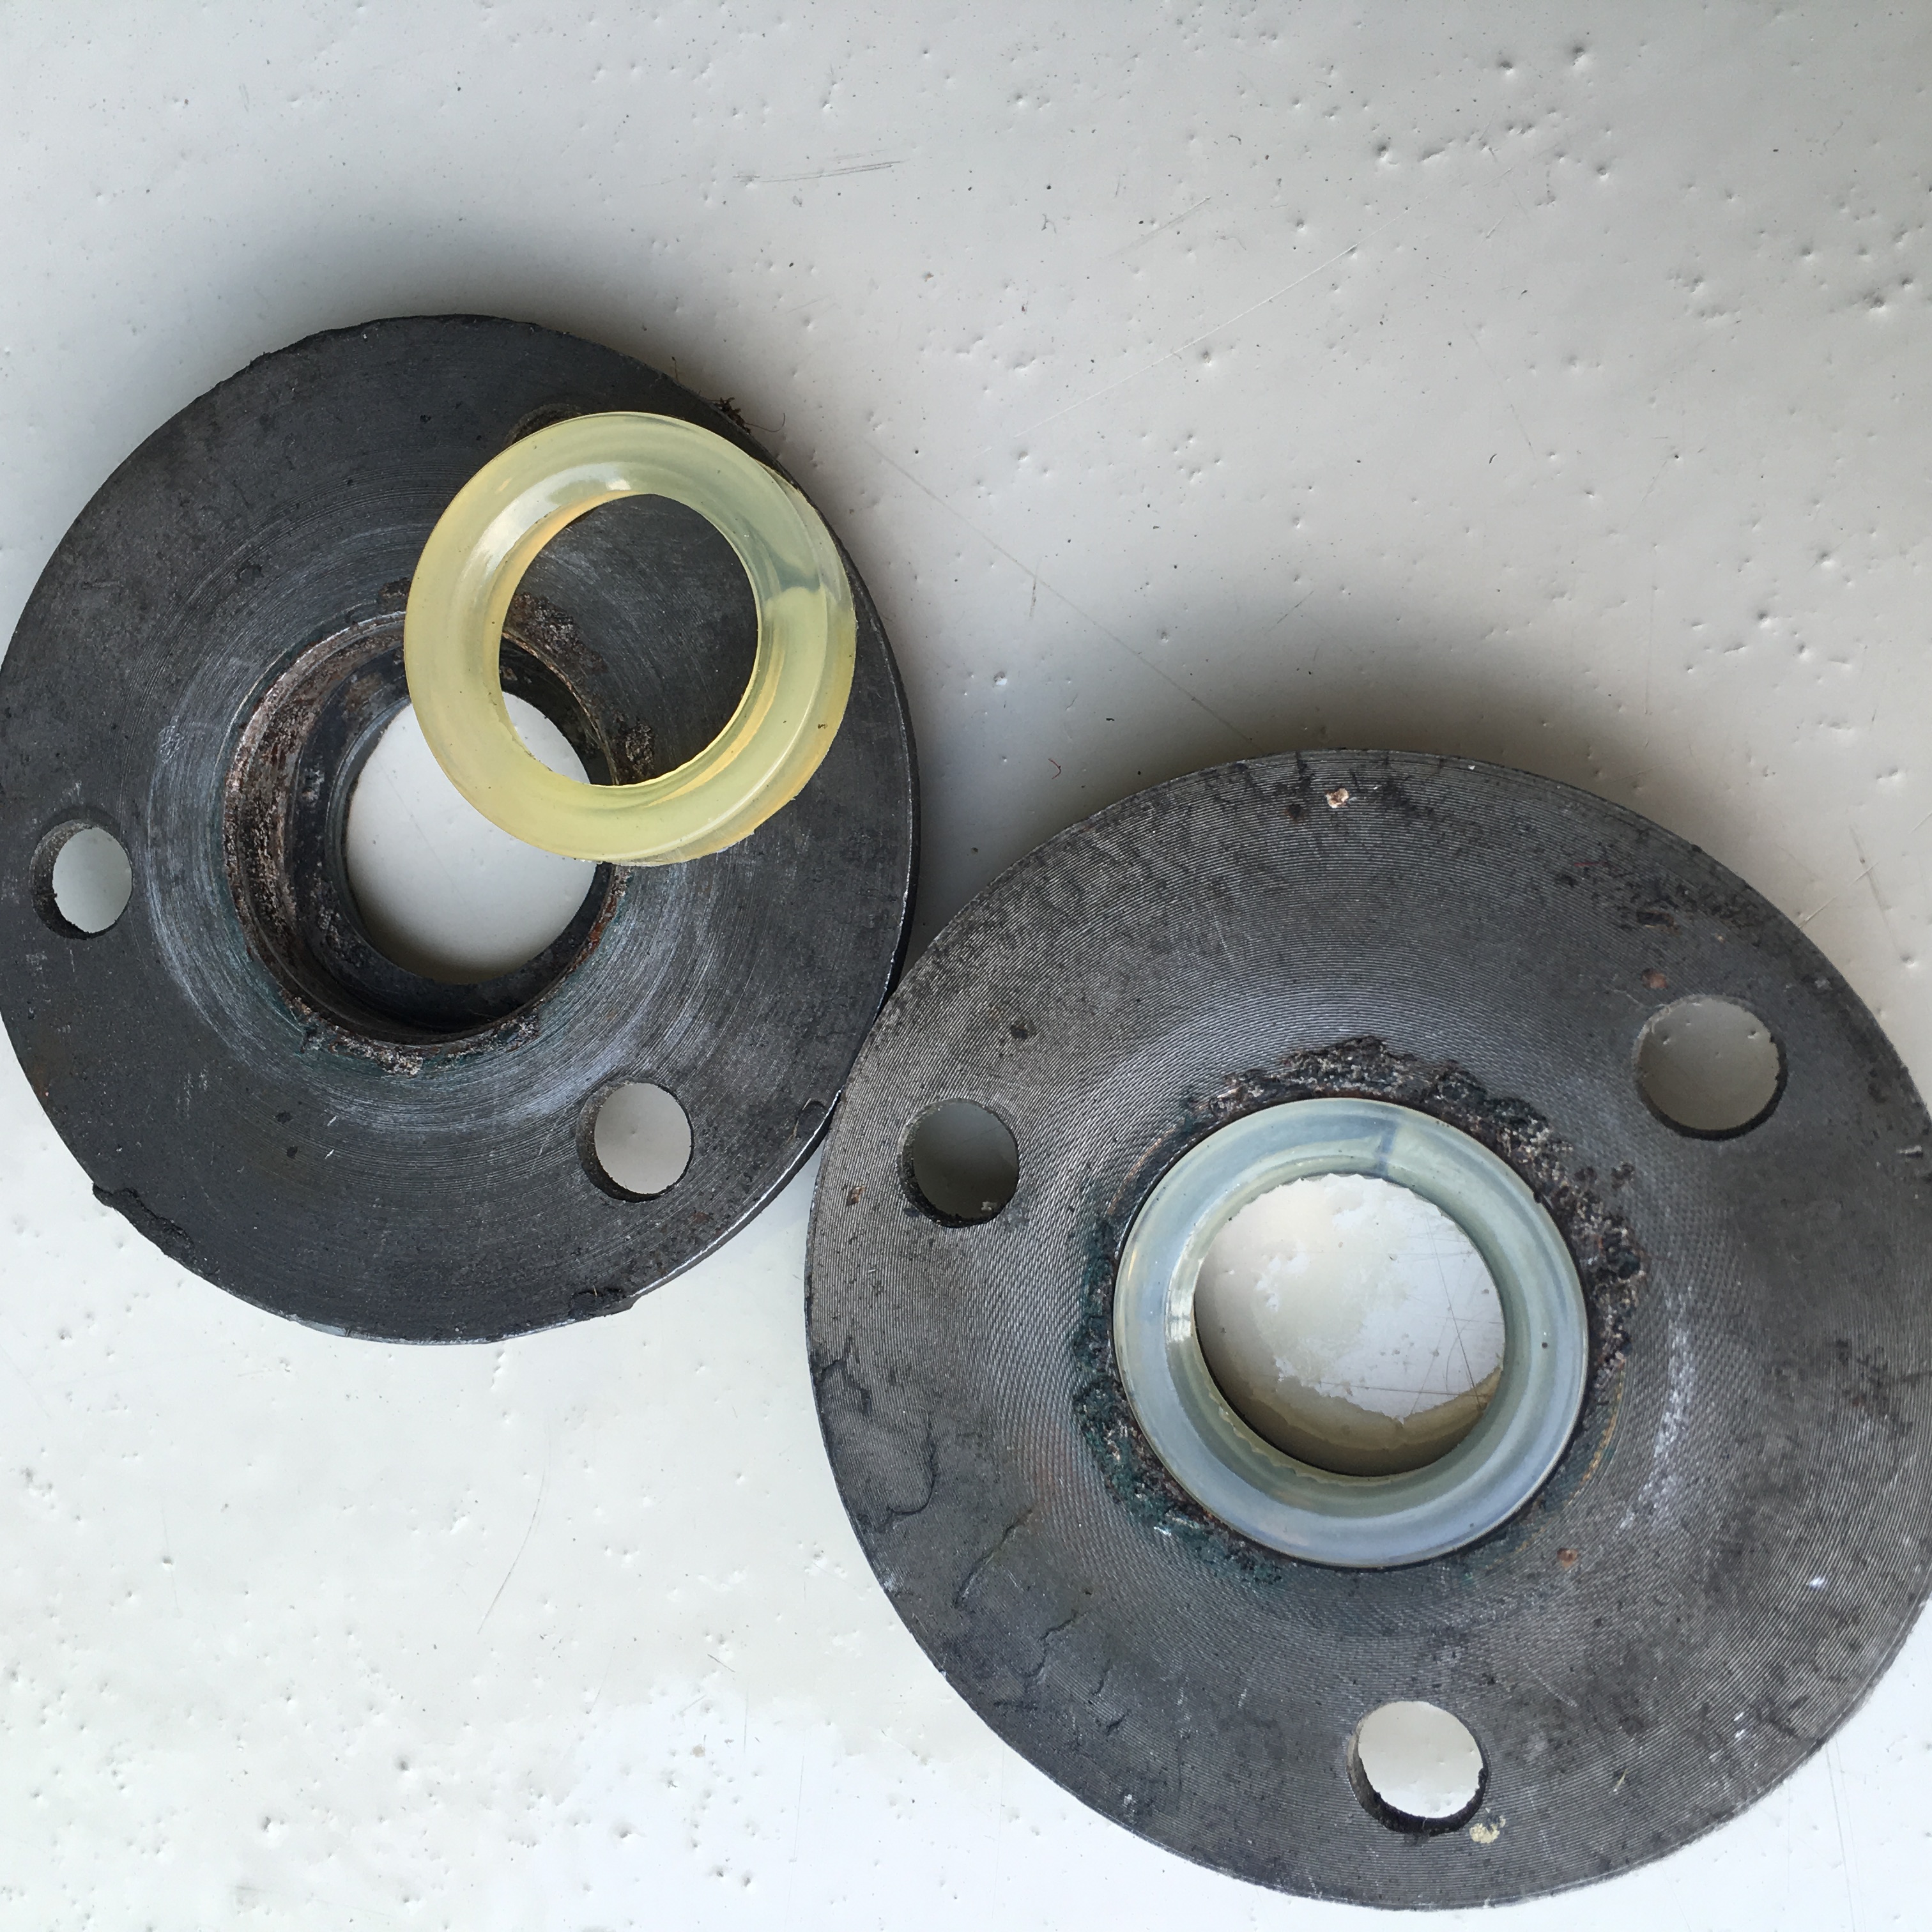
Forensic Display: The valve body housing has been destructively separated to make visible the valve head which should ordinarily be in the closed position for this state. It nearly is, but observe the small piece of plastic debris (a single fan blade) wedged between the valve and the valve seat. This is the culprit. It is holding the valve head off of the sealing body in a stuck open position.
A new assembly has been sourced and ordered. This fix will restore operation and prevent the toxic stink.
Why was this only noticeable when the vehicle was motionless? The answer is that, thanks to aerodynamics, there is high air pressure at the base of the windshield. This is also the location of the cabin fresh air intake. When moving at speed it was enough to eject the underhood fumes harmlessly beneath the car. When pulling to a stop warm air rising and depending on prevailing breeze, brought the odor topside and directly into the vent. PU