Uncontained fuel is volatile and a safety issue but there are degrees. Here is a list in order of seriousness:
- Gusher – shut off, get clear, notify the EPA
- Oozer – flow in a very gradual way, No Smoking!
- Leakage – drip drip drip, a puddle will form, have a Fire Bottle close by
- Seepage – see leakage, a nuisance, a puddle forms only after some delay
- Weepage – localized moist or damp area, could be deferred… if you feel lucky
Sometimes Seepage will, overtime, fix itself and become Weepage. My fuel pump, when off, was the latter. Containment was not difficult, however when operating [pressurized] there was definitely a leak. The old seals had become dry and hardened from disuse, decay, and exposure to old gasoline and would no longer stem the tide.
Happily there is a restorative kit available though billed as a solution for the models W113 [Pagoda], W111 [Fintail], and certain W108 models using the “Long Style” pump. Mine was an early 1st version and I was confident that it would be suitable.
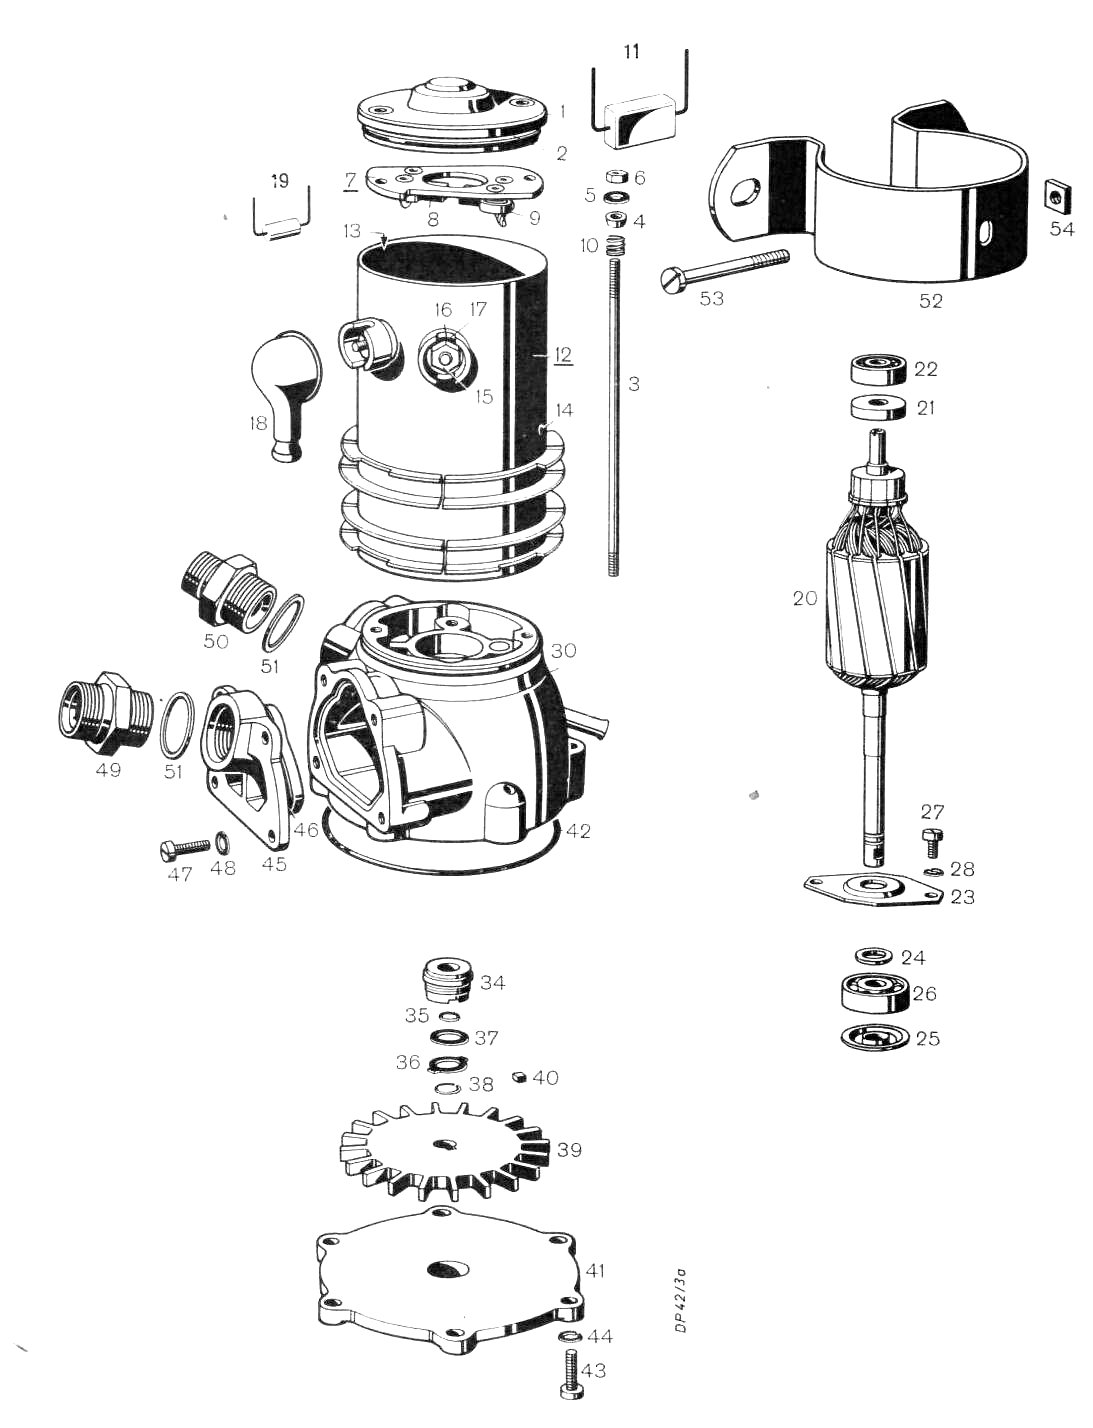
The way to find out was to order the package, disassemble, compare old parts with the new replacement and find out. The many pieces included 6 “O” rings. These would solve the escaping fuel problem. Also included were new shaft bearings and motor brushes. After 50 years / 125,000 miles use these original wear items had served their purpose. A tutorial explained the inner workings and was invaluable. The method for keeping fuel from going past the shaft housing was a clever bit: To seal the shaft to the pump housing there is a black plastic-type insert with what looks to be a neoprene collar that fits into the opening of the housing. It has a flat surface that matches a flat surface on the Bellows seal. The Bellows Seal is called a “Mechanical Seal” or “Slide Ring Seal”. A small O-Ring seals the Bellows onto the shaft. The Bellows Seal sits on the O-Ring and rotates with the shaft held in position by the locating washer. … and so on and so forth.
I merely had to follow the instructions and was only flummoxed when I compared my [removed] washer with that of the cup shaped washer from the picture tutorial. They didn’t look the same; not one bit. I rationalized that it was my 1st gen design and at this point it was deep thought and analysis to achieve understanding. The new bearings were sealed type and so I left the little cup washer out completely — thinking it superfluous. I didn’t want to alter the shaft [shim] height orientation but I deduced that its absence would not and even became convinced that it could have been a detriment.
Still, having a piece left over after reassembly is unnerving and leaving it on the bench was a leap of faith. Fingers crossed there.
Last task was to dress the commutator. Wear and tear had built a ridge of copper, or rather a valley from the carbon brush(s) track. I knocked that down ever so gently and precisely using a fingernail file not wanting to booger the armature.
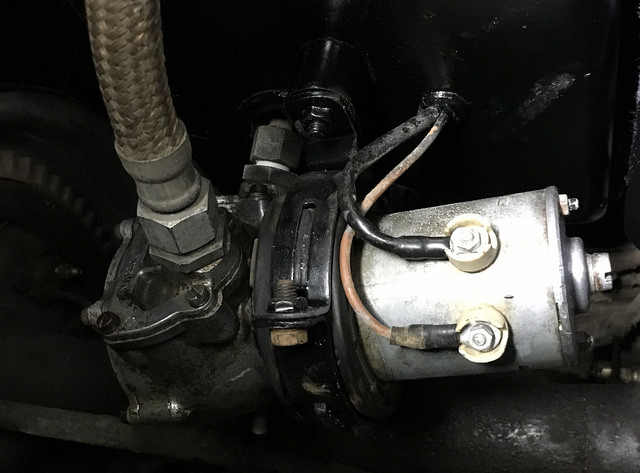
Finally, the unit was complete (excepting the confused washer) and was buttoned up and re-installed. A twist of the Ignition Key would determine success or failure. I poured fresh fuel into the tank checked for Seepage. So far so good. Jumped in the driver’s seat and turned the key. The pump at this point should and did run; purring quietly. Most importantly, no Leakage. Hoorah! and again roadworthy.